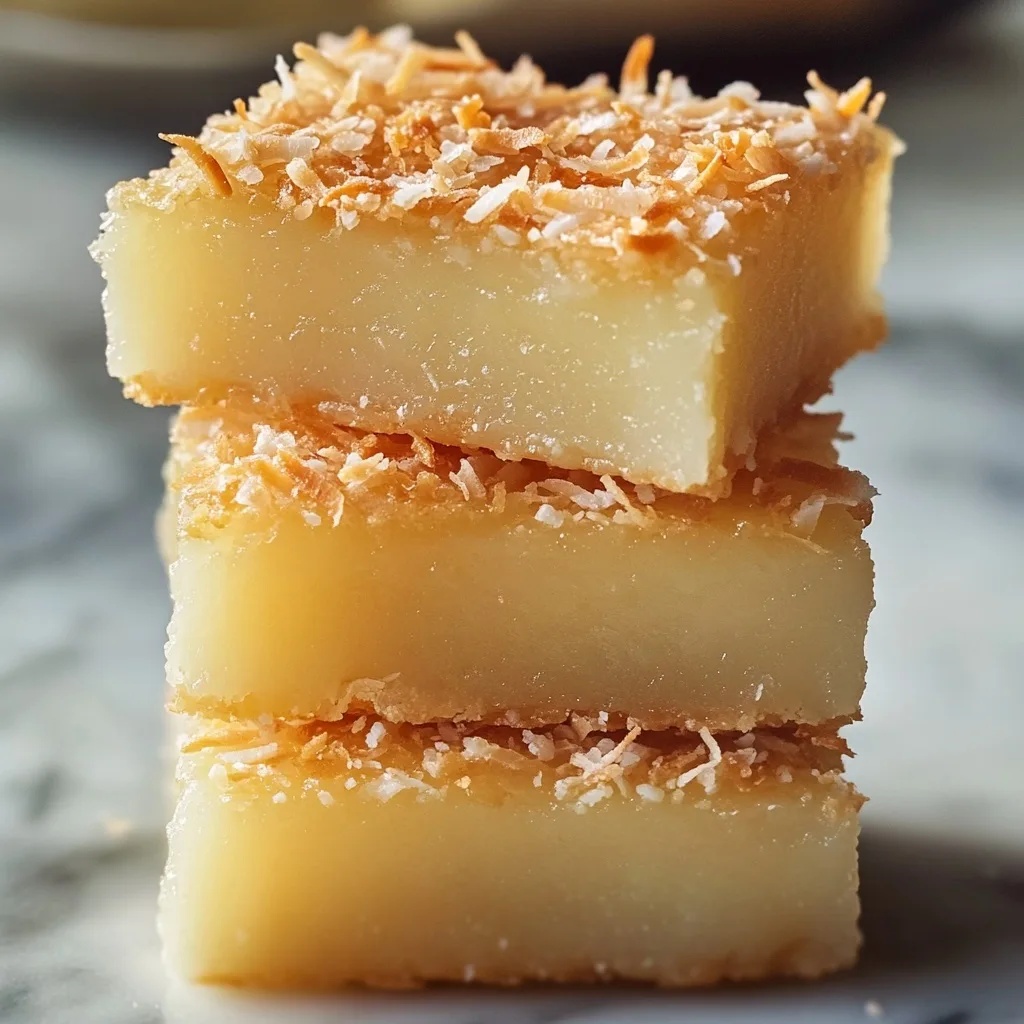
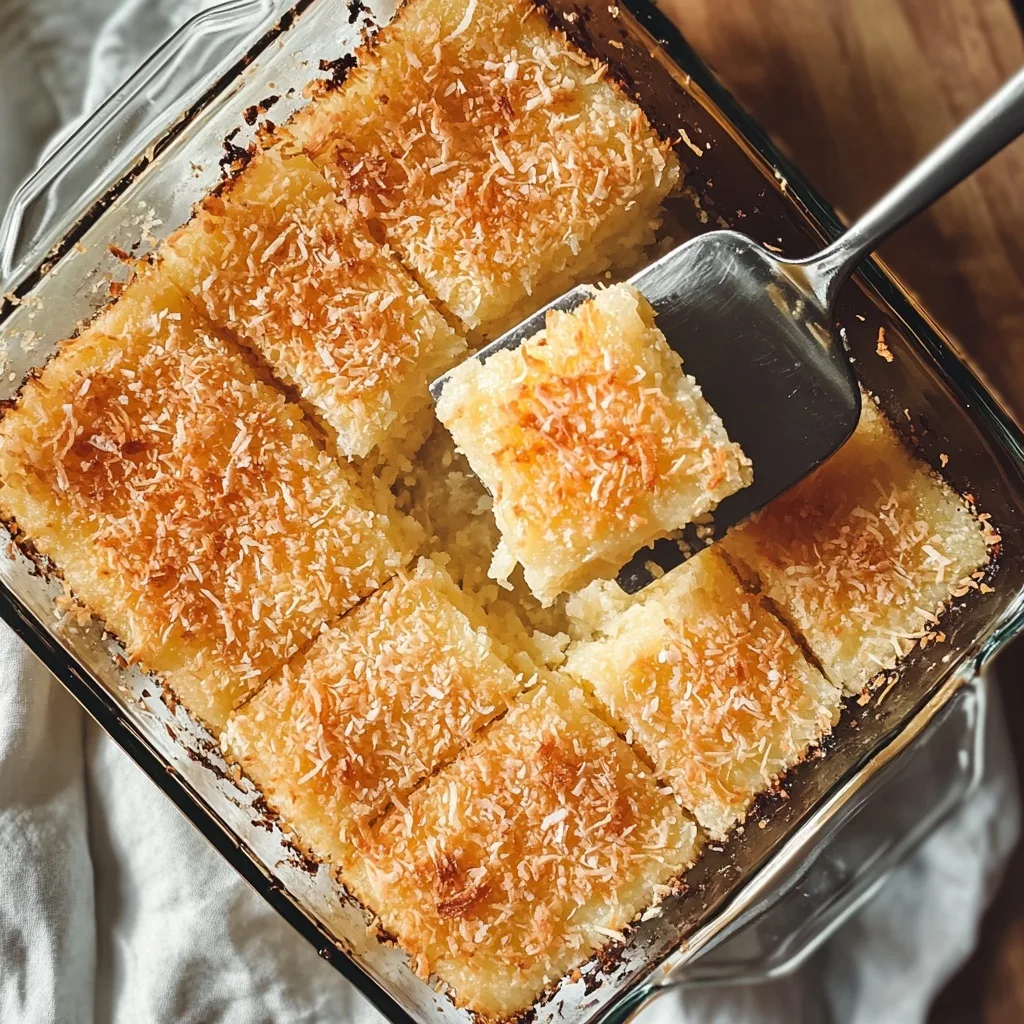
If there’s one treat that can transport you straight to the islands with a single bite, it’s butter mochi. This Hawaiian classic has all the makings of a family favorite: chewy texture, golden crisp edges, a hint of coconut, and a soft custard-like center that feels like a hug from the inside out. And the best part? Butter mochi is naturally gluten-free, making it a magical go-to dessert for families like mine navigating wheat-free kitchens.
In this article, I’ll walk you through exactly what makes butter mochi Hawaii’s most beloved dessert, why it fits beautifully into gluten-free living, how to make it in one bowl, fun flavor variations to try with your kids, and how to store it for on-the-go treats or make-ahead magic.
Discover great ideas like this gluten-free crowd-pleaser in my chickpea flour cookie recipes—another cozy fave in our home.
So grab your favorite mixing bowl—this golden beauty is coming to your table.

Explore the Steps
What Is Butter Mochi? Hawaii’s Iconic Chewy Dessert
The Story Behind Butter Mochi: Where East Meets Island
Butter mochi Hawaii-style is a one-of-a-kind dessert born from the island’s melting pot of cultures. Blending Japanese, Filipino, and Polynesian influences, this chewy golden treat has become a staple at potlucks, family gatherings, and Sunday tables across the Aloha State. It’s the kind of recipe that feels like it’s been passed from one loving hand to the next—full of history, heart, and home-baked magic.
Instead of pounding sticky rice like in traditional mochi, this version uses mochiko flour, coconut milk, butter, and eggs to make a soft, custard-like bar that’s baked—not steamed. The result? A dessert that’s rich, chewy, and just the right amount of sweet.
How It’s Different from Japanese Mochi or Brownies
Don’t confuse butter mochi Hawaii is known for with the stretchy, chewy mochi you might see wrapped around ice cream. While both use sweet rice flour, butter mochi is baked and has a delightfully crisp top with a soft, cake-like middle. Think of it as the lovechild of gooey blondies and tropical custard.
What makes butter mochi Hawaii’s favorite dessert is how versatile and unfussy it is. You can slice it into squares for lunchboxes, wrap it for a road trip snack, or serve it warm with coffee after dinner. It’s soft but sturdy, chewy but delicate—and if you’re anything like us, it disappears before it cools.
So, whether you’re missing a taste of the islands or simply craving something cozy, butter mochi hawaii deserves a spot in your recipe box.
PrintButter Mochi Hawaii – The Chewy, Golden Treat Your Family Will Love
A classic Hawaiian treat with a chewy center and golden, crisp top. Naturally gluten-free and made with mochiko flour and coconut milk, it’s perfect for snacks, potlucks, or cozy afternoons with tea.
- Prep Time: 20 minutes
- Cook Time: 1 hour
- Total Time: 1 hour 20 minutes
- Yield: 20 squares 1x
- Category: Dessert
- Method: Baking
- Cuisine: Hawaiian
- Diet: Gluten Free
Ingredients
Butter or vegetable oil, for greasing the pan
1 stick (8 tablespoons) unsalted butter
1 pound mochiko flour (sweet rice flour)
2 cups granulated sugar
2 teaspoons baking powder
1/2 teaspoon kosher salt
2 cups milk (any fat percentage)
4 large eggs
2 teaspoons vanilla extract
1 can (13.5 oz) unsweetened coconut milk
1/2 cup unsweetened shredded coconut
A few pinches of flaky salt (optional)
Instructions
Step 1:
Preheat your oven to 350°F and arrange a rack in the center. Grease a 9×13-inch baking dish with butter or oil.
Step 2:
Melt the butter in the microwave or on the stovetop, then set aside to cool slightly.
Step 3:
In a large bowl, whisk together the mochiko flour, sugar, baking powder, and salt.
Step 4:
In another bowl, whisk together the milk, eggs, and vanilla extract.
Step 5:
Pour the wet ingredients into the dry ingredients. Stir with a wooden spoon until well combined and smooth.
Step 6:
Add the melted butter and coconut milk to the batter. Stir until fully incorporated and silky.
Step 7:
Pour the batter into the greased baking dish. Tap the pan gently on the counter to release any air bubbles.
Step 8:
Sprinkle the shredded coconut evenly on top. Add a few pinches of flaky salt if using.
Step 9:
Bake for 60–70 minutes, or until the top is golden brown and the center is set.
Step 10:
Remove from the oven and cool completely on a wire rack (about 1 hour).
Step 11:
Cut into 20 squares using a plastic or greased knife to prevent sticking. Serve and enjoy!
Notes
Storage: Store in an airtight container at room temperature for up to 3 days.
Tip: If the knife sticks when slicing, rub it with a little butter or neutral oil.
- From: Aloha Kitchen by Alana Kysar (used with permission)
Nutrition
- Serving Size: 1 square
- Calories: 210
- Sugar: 18g
- Sodium: 120mg
- Fat: 9g
- Saturated Fat: 6g
- Unsaturated Fat: 2g
- Trans Fat: 0g
- Carbohydrates: 28g
- Fiber: 0.5g
- Protein: 2g
- Cholesterol: 35mg
Why Butter Mochi Is the Ultimate Gluten-Free Treat
Naturally Gluten-Free, No Weird Swaps Needed
When we first had to ditch gluten, most of my baking felt like one big experiment—chia egg this, xanthan gum that. But butter mochi Hawaii-style was one of those magical recipes that worked from the get-go. Why? Because it’s already gluten-free.
The hero here is mochiko flour, also called sweet rice flour. It comes from sticky rice, not wheat, which means you get all the chew and none of the bellyaches.
According to Healthline, sweet rice flour is a naturally gluten-free ingredient, making it safe for people with celiac disease or gluten sensitivity.
And it holds together beautifully—no crumbling, no fuss. So you can confidently cut perfect squares for snack time, bake sales, or holiday dessert tables without sacrificing taste or texture.
A Chewy, Custardy Texture That Feels Like a Hug
What makes butter mochi hawaii so different from other gluten-free desserts is its irresistible chew. You know that moment when you bite into something and everything else goes quiet? That’s what happens here. The outside turns golden and crisp, while the inside stays soft, stretchy, and just a little custardy—thanks to eggs and coconut milk.
Even if your family isn’t gluten-free, butter mochi has that comforting, crowd-pleasing magic. It’s not too sweet, doesn’t require fancy tools, and feels homemade in the very best way.
Whether you’re new to gluten-free baking or just want a dessert that brings everyone to the table, butter mochi hawaii delivers every time.
Don’t miss our chickpea chocolate chip cookies—another chewy treat that’s naturally wheat-free.
How to Make Authentic Hawaiian Butter Mochi at Home
The Pantry Staples That Create Butter Mochi Magic
The best thing about butter mochi hawaii? You don’t need a ton of fancy ingredients to get started. In fact, most of what you need is probably already in your pantry or fridge. Here’s the all-star lineup:
- Mochiko flour (sweet rice flour): This is the must-have. Don’t substitute with regular rice flour—it won’t create the same chew.
- Full-fat coconut milk: Gives that creamy, tropical richness that defines Hawaiian mochi.
- Butter: Adds depth, golden color, and that melt-in-your-mouth vibe.
- Eggs: Help the mochi puff slightly and create a custardy texture.
- Sugar and vanilla: Sweetens and balances the coconut notes.
- Baking powder + salt: Just a pinch to lift and round out the flavors.
Optional but delicious? A handful of shredded coconut or even a swirl of melted chocolate.
Step-by-Step: One Bowl, One Bake, Big Flavor
Butter mochi hawaii-style doesn’t ask for much—just your favorite mixing bowl and a bit of aloha. Here’s how we do it in my kitchen (usually with Chloe perched on a stool and Emma sneaking a taste of the batter):
- Preheat your oven to 350°F and grease a 9×13 pan.
- In a large bowl, whisk together eggs, sugar, coconut milk, melted butter, and vanilla.
- Stir in mochiko flour, baking powder, and salt until smooth. (Don’t overmix—gentle is best.)
- Pour the batter into your greased pan.
- Bake for 55–60 minutes, or until the top is golden brown and a toothpick comes out mostly clean.
- Let it cool completely before slicing into squares.
The hardest part? Not cutting into it while it’s still warm. But trust me—the chewy texture is worth the wait.
Looking for inspiration? Try this pumpkin tangzhong bread next—it’s another crowd-pleaser that works beautifully in gluten-free homes.
Melisa’s Cozy Tips for Mochi That Shines
- Use canned full-fat coconut milk, not the drinkable kind—it makes a world of difference.
- If the top starts browning too quickly, tent it with foil for the last 10–15 minutes.
- Let it cool completely before slicing. The texture sets as it cools and becomes that classic mochi chew we all crave.
Butter mochi hawaii isn’t just easy—it’s therapeutic, hands-on, and so rewarding. It’s the kind of dessert that fills your kitchen with warmth, your belly with joy, and your table with smiles.

Flavor Variations You’ll Absolutely Love
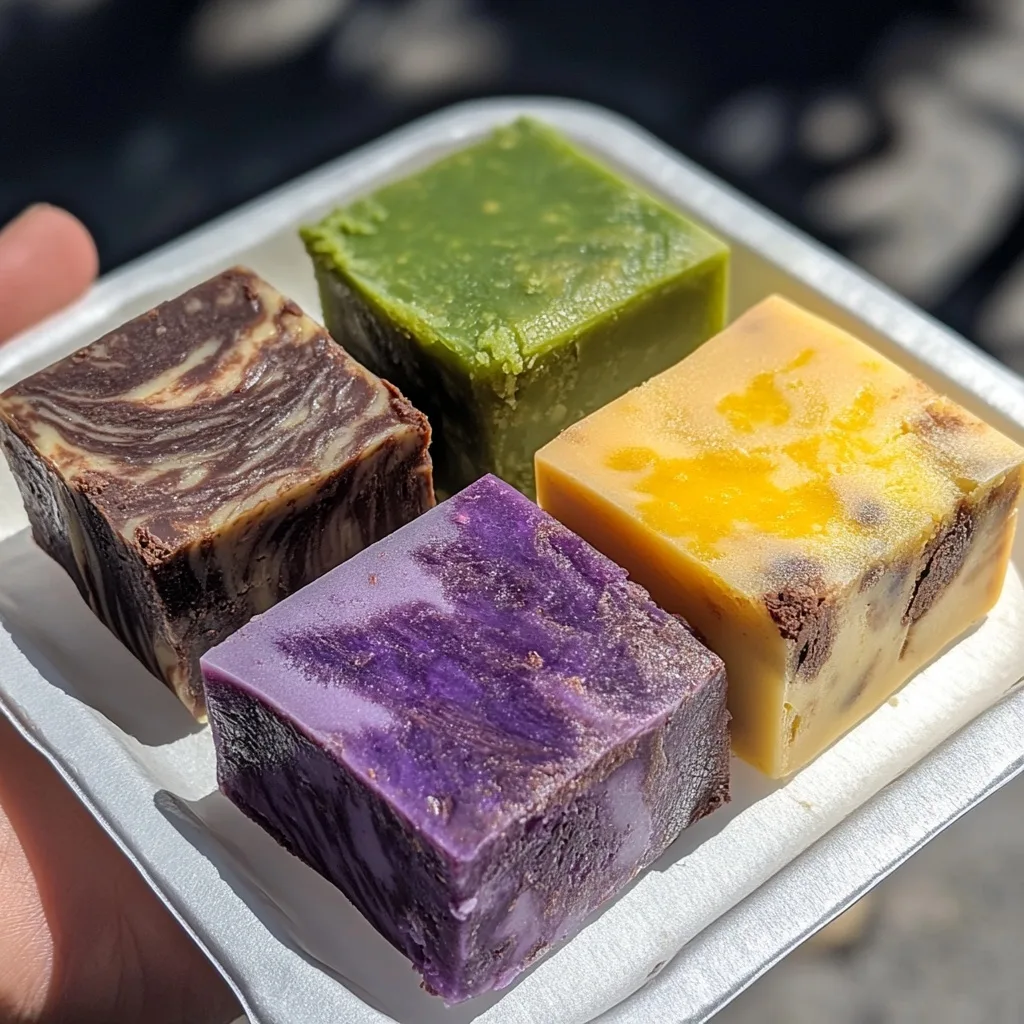
Chocolate, Ube, and More—Make It Your Own
Once you’ve nailed the classic butter mochi hawaii recipe, it’s hard not to start dreaming up ways to make it your own. And good news: this dessert is super versatile. Whether you’re baking for a chocolate lover or adding color to a kiddo’s party table, these flavor variations keep things fun and family-friendly.
Here are a few favorites from our kitchen to yours:
- Double Chocolate Butter Mochi: Mix ¼ cup cocoa powder into the batter and sprinkle mini chocolate chips on top before baking. It’s like a brownie and mochi had the world’s best baby.
- Ube Butter Mochi: Add 1 teaspoon ube extract for a gorgeous purple hue and earthy-sweet flavor. It’s a showstopper.
- Matcha Butter Mochi: Stir in 2 teaspoons matcha powder for a lightly grassy, green tea twist—great with afternoon tea.
- Lilikoi (Passion Fruit): A splash of passion fruit juice brightens up the coconut base and gives a summery citrus zing.
- Coconut Almond: Swap ½ of the coconut milk with almond milk and top with sliced almonds for a nutty crunch.
Each version still keeps that signature chew and warm coconut finish, just with a bit of flair.
Don’t miss this Pumpkin Butter Mochi Hawaii Recipe—rich, spiced, and just as chewy.

Allergy-Friendly Swaps That Still Taste Amazing
Got dietary needs? No problem. Butter mochi hawaii is surprisingly flexible. Here are a few tested swaps that don’t sacrifice flavor or texture:
| Ingredient | Swap Option | Notes |
|---|---|---|
| Eggs | 1 tbsp flax + 3 tbsp water (x4) | Slightly denser, still chewy |
| Butter | Vegan butter or coconut oil | Adds depth, use refined for less coconut taste |
| Sugar | Coconut sugar or maple syrup | Adds caramel tones, may darken color |
| Milk (if using in variations) | Oat or almond milk | Keeps it dairy-free and creamy |
These tweaks keep your butter mochi squares cozy and inclusive—so every guest can enjoy a slice.
Looking for even more ideas? Check out our gluten-free burger buns—a savory spin that’s perfect for family cookouts.
Storing, Freezing & Reheating Like a Pro
Keep It Chewy – How to Store Butter Mochi the Right Way
Freshly baked butter mochi hawaii is one of life’s great joys. But it stores better than most baked goods, which means you can enjoy that chewy-coconut goodness all week long—if it lasts that long.
Here’s how to store your squares like a mochi master:
- Room Temperature: Keep butter mochi in an airtight container for up to 2 days. No need to refrigerate right away. Just make sure it’s fully cooled before sealing.
- Refrigerator: Want it to last a bit longer? Store it in the fridge for up to 5–6 days. The texture may firm up slightly, but it stays delicious.
- Avoid stacking: If you’re layering pieces, use parchment between them to avoid sticking.
I usually pop a piece into my kids’ lunchboxes or warm one up for an afternoon tea break. Still chewy. Still amazing.
Yes, You Can Freeze It (And Reheat Like a Pro)
Gluten-free bakers, rejoice: butter mochi hawaii freezes like a dream. So go ahead—double that batch.
To freeze:
- Slice your mochi once fully cooled.
- Wrap individual squares in parchment or wax paper.
- Place wrapped pieces in a freezer-safe zip bag or container.
- Freeze for up to 2 months.
To reheat:
- Let it thaw on the counter for about 30 minutes, or
- Pop it in the microwave for 10–12 seconds for a warm, chewy bite
- You can even toast it briefly in a toaster oven for crispy edges
It’s like a cozy Hawaiian hug from your freezer—especially during chilly Hudson Valley afternoons.
Don’t miss our tigernut flour brownies—another gluten-free bake that stores like a dream and tastes even better the next day.
FAQ SECTION – Butter Mochi Hawaii Questions, Answered
What is butter mochi made of?
Butter mochi is made with mochiko flour (sweet rice flour), coconut milk, butter, eggs, sugar, and vanilla. It’s naturally gluten-free and baked until golden with a chewy center.
Is butter mochi gluten-free?
Yes, butter mochi hawaii is naturally gluten-free because it uses mochiko flour, which is made from sticky rice, not wheat.
What does butter mochi taste like?
It has a rich, buttery flavor with hints of coconut and vanilla. The texture is chewy, soft, and slightly custardy, with a golden crisp top.
How long does butter mochi last?
At room temperature, it lasts 2 days in an airtight container. In the fridge, up to 5–6 days. You can also freeze it for up to 2 months.

