
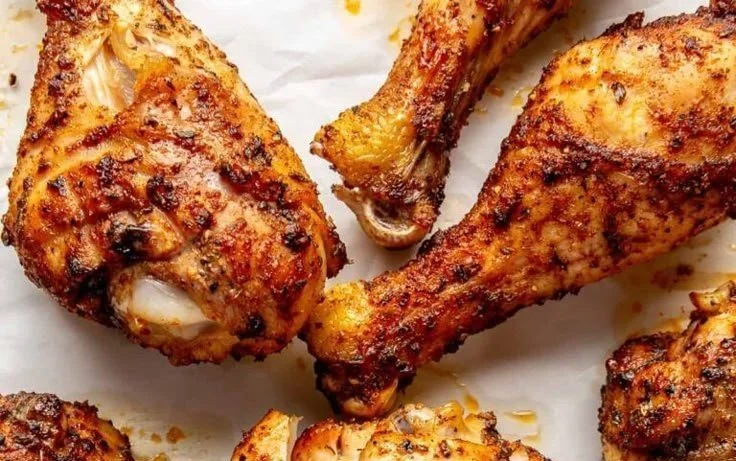
When I first stumbled upon the idea of seasoning and baking chicken drumsticks, I was taken back to a time spent around the dinner table with friends, laughter filling the air. This recipe for Seasoned Crispy Chicken Drumsticks captures that essence perfectly. It’s a nostalgic dish that effortlessly blends comfort and convenience, making it an ideal choice for weeknight dinners or weekend gatherings with family and friends. The simplicity of preparation combined with the rich flavors of spices creates a delicious meal that’s hard to resist.
Why You’ll Love This Dish
What makes this recipe special? Well, it’s not just about the taste— it’s also about how easy and rewarding it is to make crispy chicken drumsticks at home. You’ll adore the tender and juicy meat paired with a perfectly seasoned, crispy skin. Plus, it’s a budget-friendly dish that doesn’t skimp on flavor, making it ideal for families or anyone looking to impress guests without breaking the bank.
“These drumsticks were an instant hit! My kids couldn’t get enough, and they were so easy to make. Definitely adding this to our regular dinner rotation!” – A satisfied home cook
How to Make Seasoned Crispy Chicken Drumsticks
The cooking process for these seasoned chicken drumsticks is straightforward and efficient. You’ll start by prepping the chicken, tossing it in olive oil and spices, and then baking it to golden perfection. The whole experience is quick, with minimal cleanup, allowing you to spend more time enjoying your meal and less time in the kitchen.
- Preheat your oven to 420°F.
- Pat all drumsticks dry with a paper towel to remove excess moisture and place them in a large bowl.
- Ensure the skin is intact and covering the meat.
- Toss the drumsticks with olive oil, ensuring each piece is fully coated.
- Add the seasonings: sea salt, garlic powder, chili powder, oregano, paprika, and ground pepper. Mix until evenly coated.
- Prepare a baking sheet by spraying it with oil, then place a rack on top.
- Arrange the drumsticks on the rack and bake for 35 minutes.
- After 35 minutes, carefully flip each drumstick and bake for an additional 15 minutes.
- Once golden and crispy, remove from the oven and let them cool slightly. Enjoy!
What You’ll Need
To create these delightful drumsticks, gather the following ingredients:
- 3 packs pasture-raised chicken drumsticks (or about 13-15 drumsticks)
- 3-4 tablespoons extra virgin olive oil
- 2 teaspoons sea salt
- 2 teaspoons garlic powder
- 2 teaspoons chili powder
- 2 teaspoons oregano
- 1 teaspoon paprika
- 1 teaspoon ground pepper
If you’re looking to switch things up, feel free to experiment with different spices or even use coconut oil in place of olive oil for a unique flavor twist.
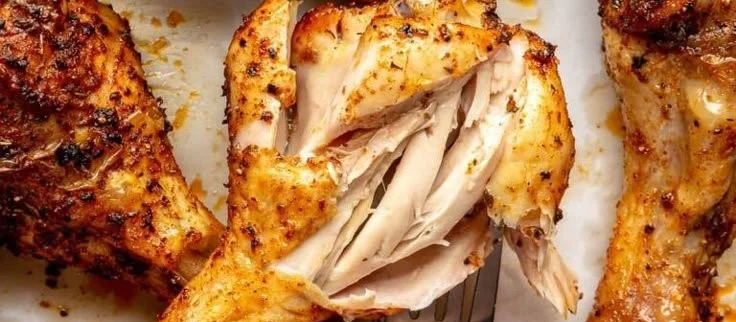
Step-by-Step Instructions
- Preheat your oven to 420°F.
- Pat all drumsticks dry using a paper towel; it helps achieve that satisfying crispness.
- Ensure the skin is intact to trap the flavor while baking.
- Toss the drumsticks in a bowl with olive oil, ensuring every piece gets a good coat.
- Sprinkle in the seasonings: sea salt, garlic powder, chili powder, oregano, paprika, and ground pepper. Mix to coat evenly.
- Grease a baking sheet with oil and place a rack on top.
- Set the drumsticks on the rack and bake for 35 minutes.
- After 35 minutes, flip each drumstick and bake for another 15 minutes.
- When they are golden and crispy, remove from the oven and allow them to cool for a few moments before diving in. Enjoy!
Best Ways to Enjoy It
These seasoned crispy chicken drumsticks can stand alone, but they’re even better with a few well-thought-out side dishes. Consider serving them with creamy coleslaw, roasted vegetables, or fluffy mashed potatoes. You could also whip up a tangy barbecue sauce or a zesty dipping sauce for added flavor. And don’t forget a cool, refreshing drink—perhaps a homemade lemonade or iced tea—to balance the savory richness of the drumsticks.
Recommended Kitchen Tools
Professional Knife Set
Keep your kitchen prepared with a reliable knife set that makes chopping and prepping effortless. A sharp knife is essential for ensuring you can prepare your ingredients quickly and safely.
Bamboo Cutting Board Set
This practical and durable bamboo cutting board set offers a sturdy surface for all your chopping needs and is easy to clean. It’s the ideal tool for prepping your chicken drumsticks and vegetables alike.
Dual Basket Air Fryer
The dual basket air fryer elevates your cooking game, allowing for healthier frying options and delivering that crispy texture everyone loves. It’s perfect for making quick meals without all the oil.
How to Store
To store any leftover chicken drumsticks, keep them in an airtight container in the refrigerator. They should stay fresh for up to four days. If you want to keep them longer, consider freezing them in a freezer-safe container, where they can last up to three months. When reheating, simply place them in the oven for about 10 minutes at 350°F, allowing them to regain their crispiness.
Tips to Make It Perfect
- Make sure to pat the drumsticks dry before marinating; this helps achieve that coveted crispy skin.
- Don’t skip the oil! It ensures even cooking and helps the spices cling to the chicken.
- For an extra kick, add your favorite hot sauce into the spice mix for a spicy twist.
- Monitor your oven closely during the last minutes of baking for the perfect level of crunch without burning.
Recipe Variations
Feel free to personalize your crispy chicken drumsticks! You can try adding different spice blends, such as lemon-pepper or curry powder, for a unique taste. Alternatively, consider a BBQ style by tossing the cooked drumsticks in your favorite barbecue sauce before serving, or swapping the chicken with drumsticks from other meats like turkey.
Frequently Asked Questions
How long does it take to prepare these chicken drumsticks?
Preparation takes about 15-20 minutes, with a total cooking time of around 50 minutes.
Can I use frozen chicken drumsticks?
Yes, just make sure to thaw them completely before cooking to ensure even baking.
What can I substitute for olive oil?
You can use melted coconut oil, avocado oil, or even melted butter as an alternative.
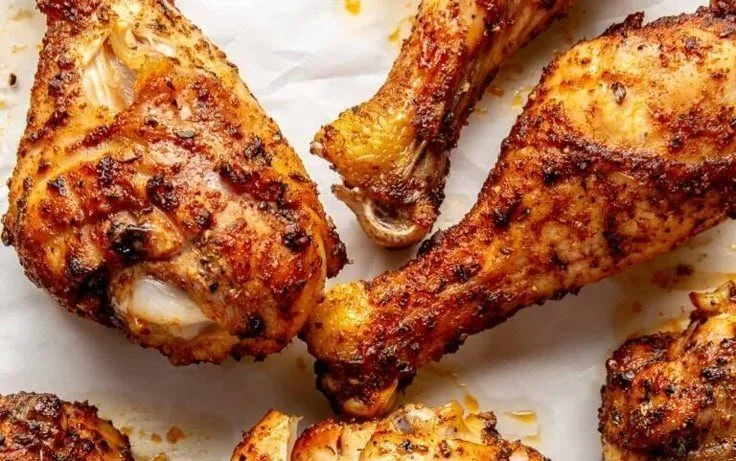
Seasoned Crispy Chicken Drumsticks
A nostalgic dish that combines comfort and convenience, perfect for weeknight dinners or gatherings.
- Prep Time: 20 minutes
- Cook Time: 50 minutes
- Total Time: 70 minutes
- Yield: 4 servings 1x
- Category: Main Course
- Method: Baking
- Cuisine: American
- Diet: Paleo
Ingredients
- 3 packs pasture-raised chicken drumsticks (about 13–15 drumsticks)
- 3–4 tablespoons extra virgin olive oil
- 2 teaspoons sea salt
- 2 teaspoons garlic powder
- 2 teaspoons chili powder
- 2 teaspoons oregano
- 1 teaspoon paprika
- 1 teaspoon ground pepper
Instructions
- Preheat your oven to 420°F.
- Pat all drumsticks dry with a paper towel to remove excess moisture.
- Ensure the skin is intact and covering the meat.
- Toss the drumsticks with olive oil.
- Add the seasonings and mix until evenly coated.
- Prepare a baking sheet by spraying it with oil and placing a rack on top.
- Arrange the drumsticks on the rack and bake for 35 minutes.
- After 35 minutes, carefully flip each drumstick and bake for an additional 15 minutes.
- Once golden and crispy, remove from the oven and let them cool slightly.
Notes
Perfectly crispy skin can be achieved by patting the drumsticks dry and ensuring an even coat of oil and spices.
Nutrition
- Serving Size: 1 serving
- Calories: 400
- Sugar: 0g
- Sodium: 600mg
- Fat: 22g
- Saturated Fat: 6g
- Unsaturated Fat: 14g
- Trans Fat: 0g
- Carbohydrates: 1g
- Fiber: 0g
- Protein: 30g
- Cholesterol: 80mg